Stop overpaying - start transferring money with Ogvio. Sign up, invite friends & grab Rewards now! 🎁
If you want to dive into the world of DeFi and play a role in enhancing market efficiency, you might want to start by becoming a liquidity provider. However, you can only do that on AMM-based DEXs. So, let's talk about PancakeSwap liquidity provision, as it’s one of the biggest AMMs on the Binance Smart Chain (BSC).
Even though I'll show you how to provide liquidity via PancakeSwap on BSC, you can provide it in a similar way on other supported networks as well (Ethereum, Polygon, etc.).
Also, keep in mind that while you might notice the word “liquidity” on centralized exchanges, like liquidity farming on Binance, for example, it’s not the same thing. That being said, let’s talk about how to add liquidity to PancakeSwap.

Did you know?
Subscribe - We publish new crypto explainer videos every week!
Proof of Work vs Proof of Stake: Which is Better? (ANIMATED)


Table of Contents
How to Add Liquidity to PancakeSwap?
Becoming a PancakeSwap liquidity provider is very easy, whether you want to add liquidity PancakeSwap, or remove it. It's just a matter of clicking a few buttons, especially when following the recommended settings. However, if you want to tweak these settings, there are some things you should know.
Latest Deal Active Right Now:Before getting into that, note that I'll go over the process of providing liquidity on BSC testnet (so you can play around a little bit before putting your actual assets in). However, if you want to practice liquidity provision on other testnets, like Ethereum Goerli, for example, you can do that as well, the steps are basically the same.
Step 1: Go to PancakeSwap and connect your wallet. I chose to connect MetaMask, but you can connect various other wallets as well.
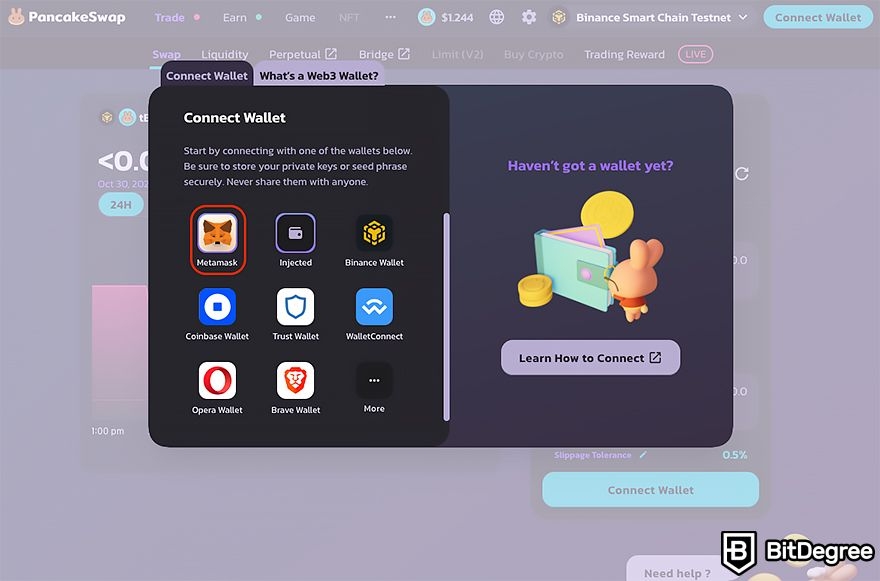
When it comes to MetaMask, it’s best to have its browser extension installed so you can add liquidity to PancakeSwap pools without any problems.
Once you click on MetaMask, you’ll be asked to approve the connection on your wallet. Click “Next” and then “Connect.”
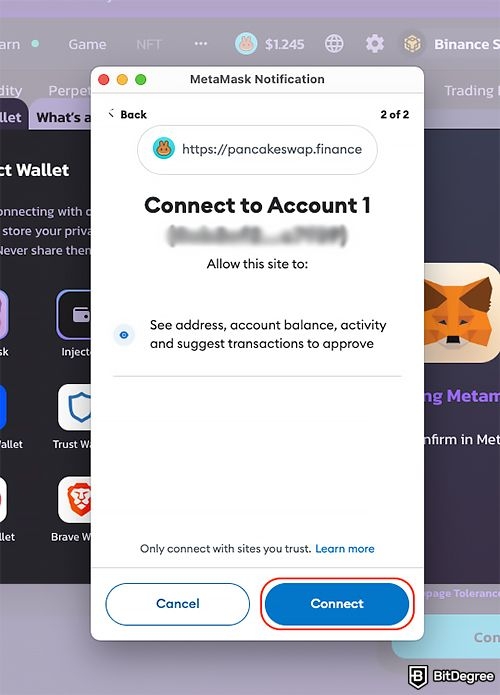
Keep in mind that if your MetaMask wallet is connected to the Ethereum network (by default, it is), you’ll also be prompted to switch your network to BSC. However, if you're interested in PancakeSwap liquidity provision on other chains, like Ethereum Goerli testnet, for example, you can switch the network on your wallet, and it will switch on the platform as well.
Step 2: When you’re all set, hover your mouse over the “Earn” tab and then click on the “Liquidity” button. By the way, you can also provide liquidity through the yield farming interface, which is what you must do before you're allowed to stake.
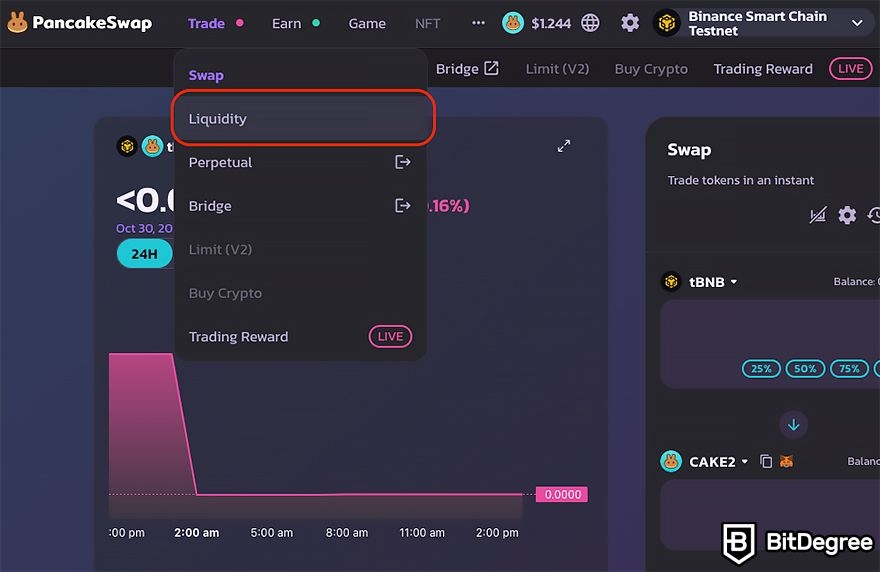
Step 3: You’ll be taken to the PancakeSwap V3 liquidity provision page, which looks like this:
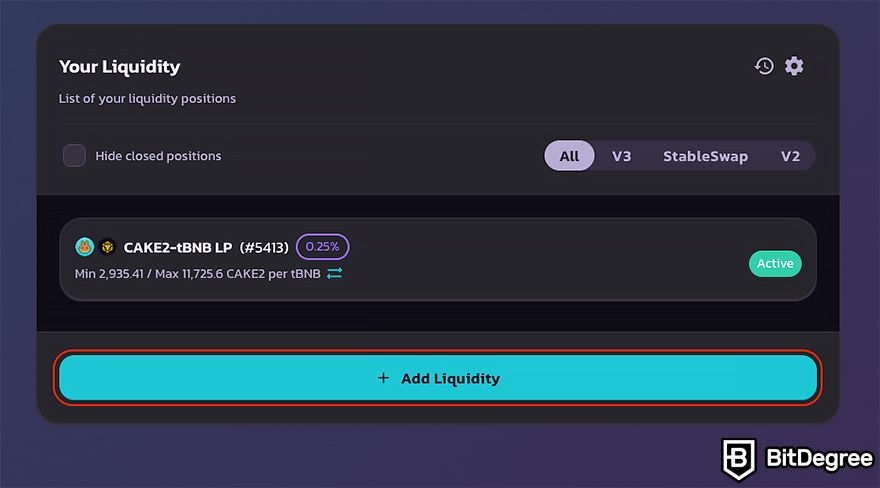
This is where you can add liquidity to new pools or make PancakeSwap liquidity checks on the pools in which you’re already a liquidity provider.
Once you click on the “Add Liquidity” button, you’ll be taken to this page:
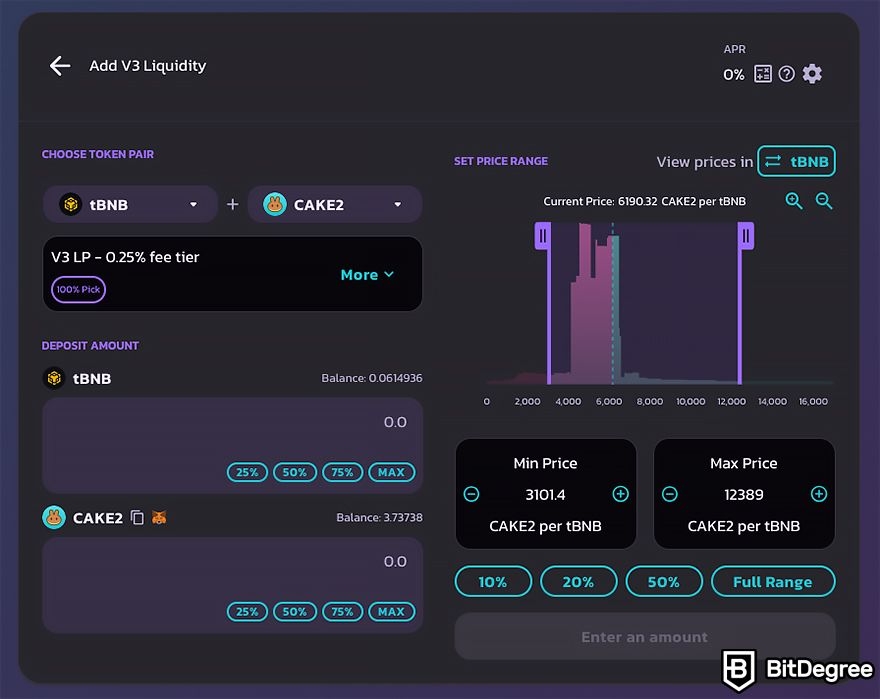
Step 4: The very first thing you should do is choose the token pair to which you want to add liquidity.
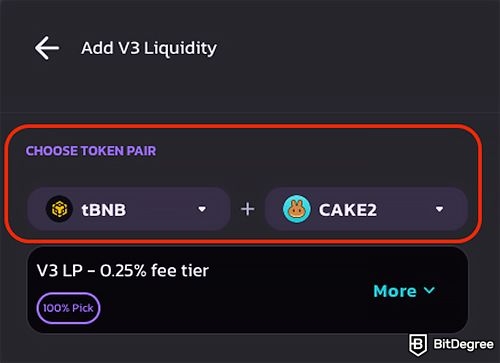
I went with tBNB/CAKE2. If you want to practice on Goerli, however, it would be best to choose GOR/tUSDC pair. Just make sure to swap a portion of GOR for tUSDC (you can find how to do that here).
Step 5: You will be set with the most popular liquidity pool fee tier. It's recommended to proceed with that tier as it is based on the trading pair in question. However, if you want to change it, just click “More” on the fee tier box and pick another one (0.01%, 0.05%, 0.25%, or 1%).
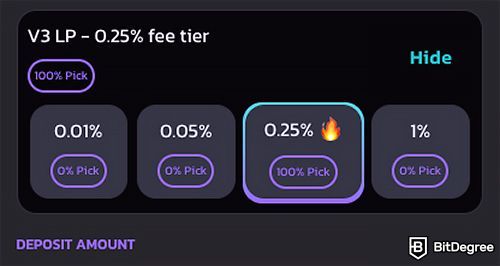
How to know which one to pick to get a positive answer to the question, “Is providing liquidity on PancakeSwap worth it?”. Well, the choice of trading fee configuration isn't one-size-fits-all. Typically, more volatile tokens benefit from a higher trading fee to offset potential impermanent losses, while stablecoins, known for their steadier prices, are better suited with a lower trading fee.
Step 6: The next step is to check out the price range chart on the right side of the page. It illustrates liquidity levels across different price ranges. To tailor the price range, you can drag the handles, use the +/- buttons, or manually input values.
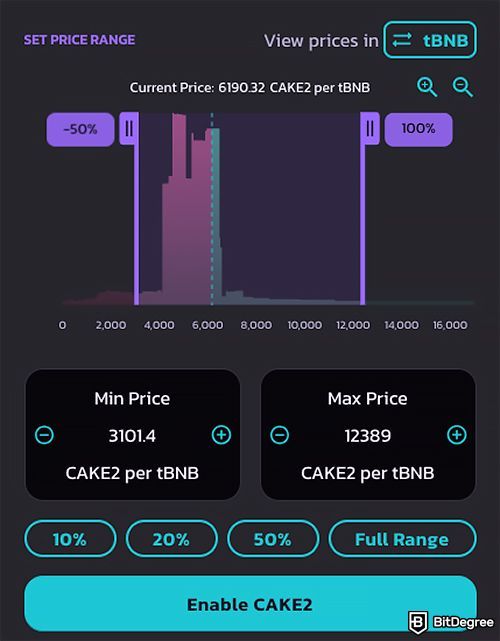
While not recommended, you can also supply liquidity for the entire price range by selecting the "Full Range" option. Concentrating your liquidity in a smaller price range, though, can increase your share of rewards. However, note that you'll only earn rewards when the trading price stays within your chosen range.
Step 7: Now, you should choose the amount of tokens you plan to add to a liquidity pool. You can fill in only one and the other will be filled automatically based on the price range.
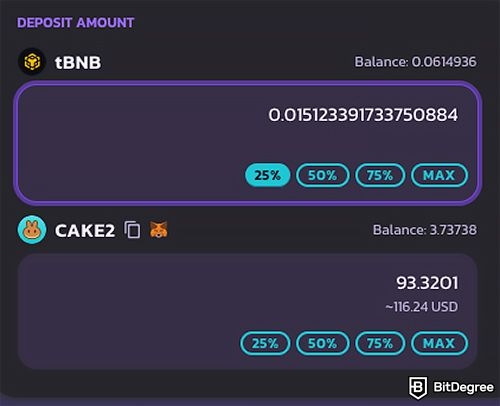
You can write manually or use the percentages below each box to use a certain percentage of your funds.
Step 8: After you set everything up, click “Enable X” (X is CAKE2 in my case). A wallet extension will appear, asking you to provide permission to your funds and set a spending cap (if you want to know how to revoke this permission, check out this guide).
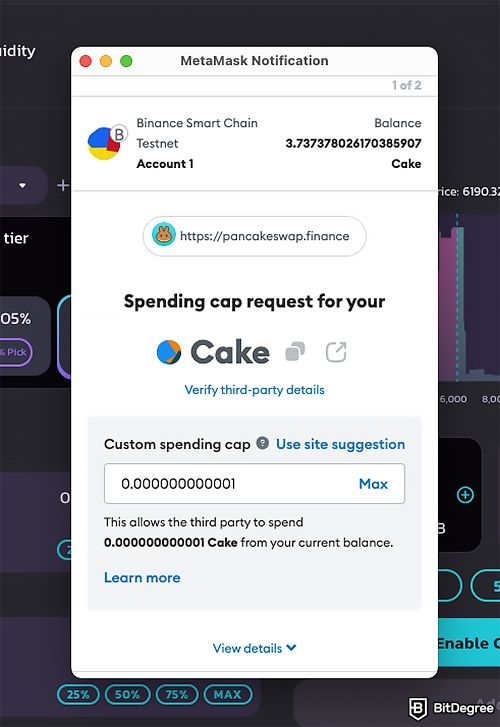
The lower your spending cap is, the less risk you face. Once you feel comfortable with the spending cap, click “Next” and then “Approve.”
Step 9: Eventually, click “Add,” check out the summary, and click “Add” again. After another wallet confirmation, you’ll be all set.
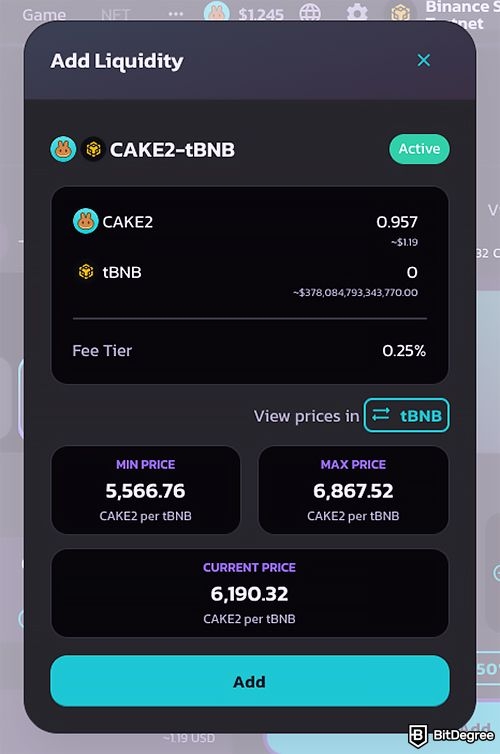
That's it - you're now a PancakeSwap liquidity provider. To learn how to remove liquidity from PancakeSwap, check out this guide.
Why Should You Add Liquidity to Pools?
Now you know how to lock liquidity on PancakeSwap (yes, locking and adding liquidity means the same thing). However, another question is, “Why should you become a PancakeSwap liquidity provider?”
Well, it actually has various benefits. First and foremost is the potential to earn swapping fees. As transactions occur within the pool, a portion of the fees generated is distributed among liquidity providers.
Each exchange has different fees, but when it comes to PancakeSwap V3, the amount of fees that go to liquidity providers depends on the fee tier of the pool. For example, if we take a 0.25% fee tier pool, 68% of that fee goes to liquidity providers.
So, at the end of the day, the answer to the question, “Is PancakeSwap liquidity lock (BSC) worth it?” might depend on the fee tier of the pool.

Besides that, though, adding liquidity significantly enhances market efficiency. By locking assets in a pool, you deepen the available liquidity, ultimately reducing slippage. This ensures that traders can execute their transactions more smoothly, without experiencing significant price fluctuations.
Furthermore, some DeFi platforms offer additional rewards and incentives to liquidity providers. These rewards may come in the form of governance tokens or specific tokens issued by the platform as a token of appreciation for contributing to the liquidity pool.
However, it's important to approach liquidity provision with caution and a thorough understanding of the specific pool's dynamics. There are risks involved, including impermanent loss and exposure to smart contract vulnerabilities. Therefore, you should conduct thorough research and consider the potential risks before deciding to add liquidity to any pool.
Conclusions
So there you have it, a guide on how to become a PancakeSwap liquidity provider. You just need to pick a token pair, decide how much you want to add, and set a price range together with the fee tier (or go with the recommended settings). After clicking a few buttons, you’ll start your liquidity provision journey.
By adding liquidity to pools, you not only generate some decent rewards from swapping fees but also contribute to market efficiency. Just don’t forget that there are risks as well, so stay informed and don’t lock away too much of your funds.
The content published on this website is not aimed to give any kind of financial, investment, trading, or any other form of advice. BitDegree.org does not endorse or suggest you to buy, sell or hold any kind of cryptocurrency. Before making financial investment decisions, do consult your financial advisor.


