Stop overpaying - start transferring money with Ogvio. Sign up, invite friends & grab Rewards now! 🎁
Let’s cut to the chase - you want to explore the BNB testnet, and need tokens to do so. Buying crypto on a centralized exchange seems simple enough, but you can’t really follow the same flow when testnets are involved - so, how to get BNB testnet tokens?
It’s actually simpler than you think. Let me show you.

Did you know?
Subscribe - We publish new crypto explainer videos every week!
How to Learn Crypto The Easy Way? (Trending Beginners' Strategy)


Table of Contents
First Things First - You Need a Wallet
Obviously, if you plan to interact with the BNB testnet, you’ll need a cryptocurrency wallet to do so. If you have a wallet (such as MetaMask or Coinbase Wallet) already set up, you can skip this part - if not, let me guide you through it.
Latest Deal Active Right Now:Crypto wallets (sometimes referred to as "Web3 wallets") are places where you store your coins and tokens. They can be software, hardware, browser extensions, even paper ones. Generally speaking, these days, most high-profile wallets are both very beginner-friendly to use, as well as easy to set up.
So, first, decide on the wallet that you want to use. Obviously, I would always recommend hardware wallets, whatever you might be doing within Web3 (including "how to get BNB testnet wallet"). However, for the sake of convenience and simplicity, I’ll stick to the two aforementioned browser-based wallets - MetaMask and Coinbase.
Also, do note that while I’ll be guiding you through the setup on a computer, the whole entire process is very similar if you’re doing it on your smartphone - it’s just that you’d be downloading an app, instead of a browser extension.
Setting Up MetaMask
First, let’s set up a MetaMask wallet.
Step 1: Navigate to MetaMask’s official website. Click on “Download”, and on the screen that appears, click “Install MetaMask for Chrome”. Note that the wallet is supported on Chrome and FireFox, but not on browsers such as Safari.
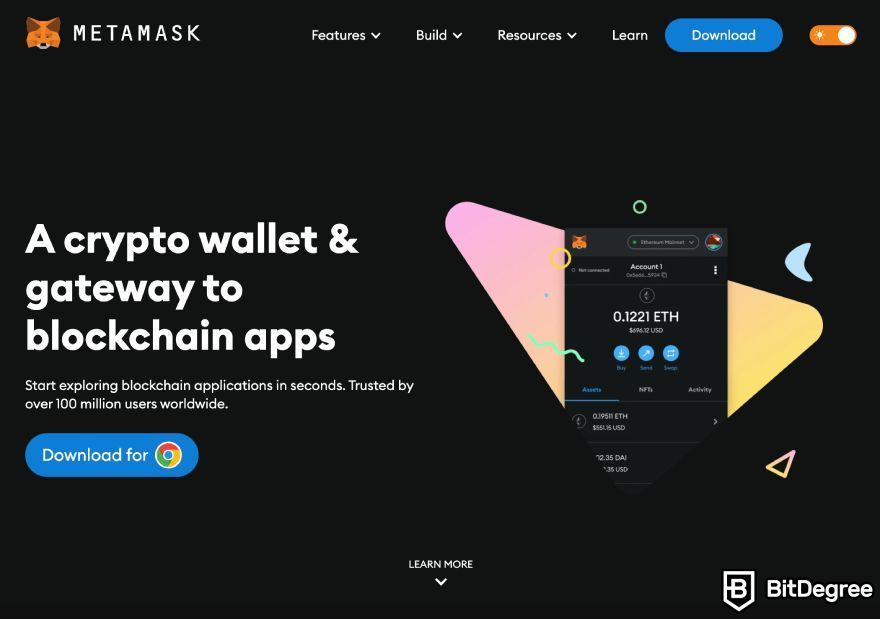
Step 2: You’ll be redirected to the Chrome Web Store. Click to add the MetaMask extension to your browser, and confirm, when prompted.
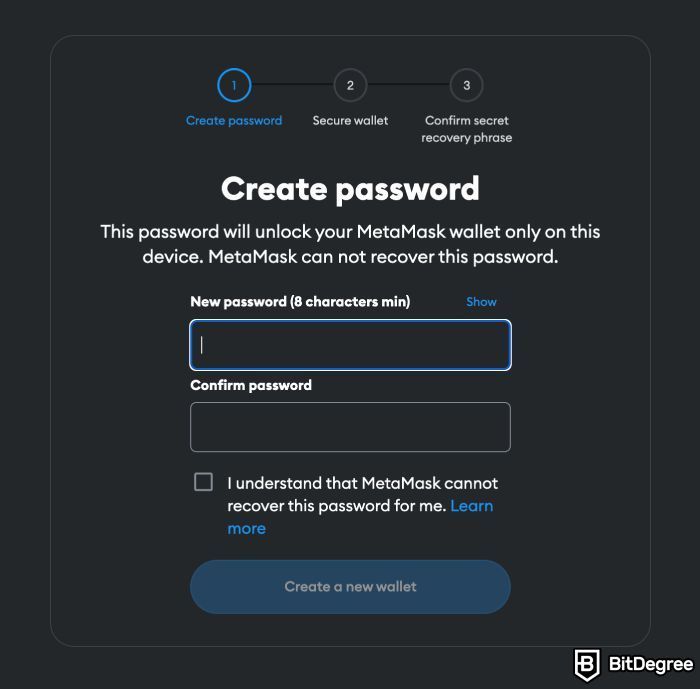
Step 3: After a few agreements and confirmations, you’ll be prompted to create a password - standard stuff. Make sure to use a password that you don’t use anywhere else, and follow the proper safe password creation practices!
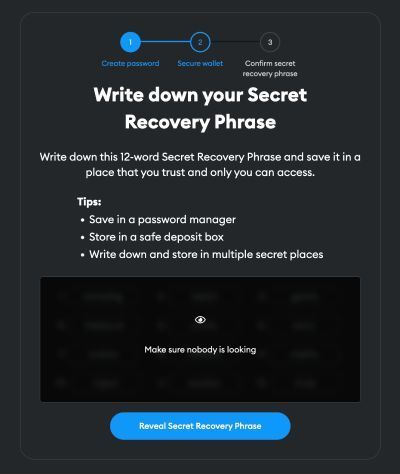
Step 4: Lastly, you’ll be asked if you want to write down your recovery phrase. Obviously, do so - this is basically the only way to get your wallet back, if you were to lose access to it, so make sure that you keep it safe, and never reveal it to anyone else!
Step 5: Once you have your secret recovery phrase secured, that’s frankly it - you can pin the MetaMask wallet browser extension, if you’d like, but either way, the wallet is installed and ready to be used!
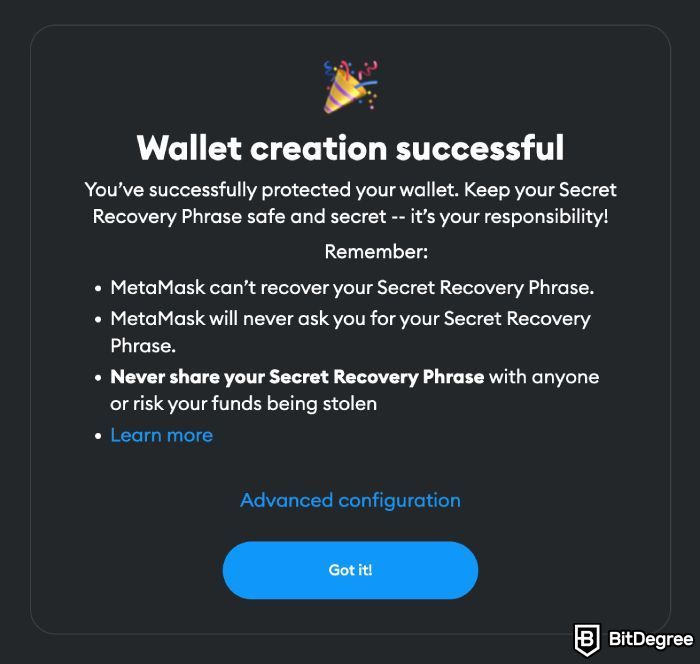
(OPTIONAL) Step 6: The last step involves the question of how to add the BNB testnet to MetaMask. Now, if you’re using some sort of a service that requires you to switch to the BNB testnet (e.g., the BitDegree Web3 Exam or Missions), you do not need to do this step - your network will be switched automatically, and all you need to do is confirm the switch, when prompted.
However, if you *do* want to do it manually, with MetaMask it’s a bit annoying, since the wallet doesn’t list the testnet, and requires you to enter all details by hand.
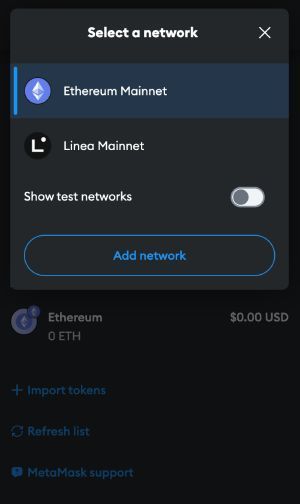
That said, it doesn’t need to be complicated, at all. First, inside your MetaMask wallet, click on the little Ethereum logo at the top-left corner of the screen. Once the menu opens up, click on “Add network”.
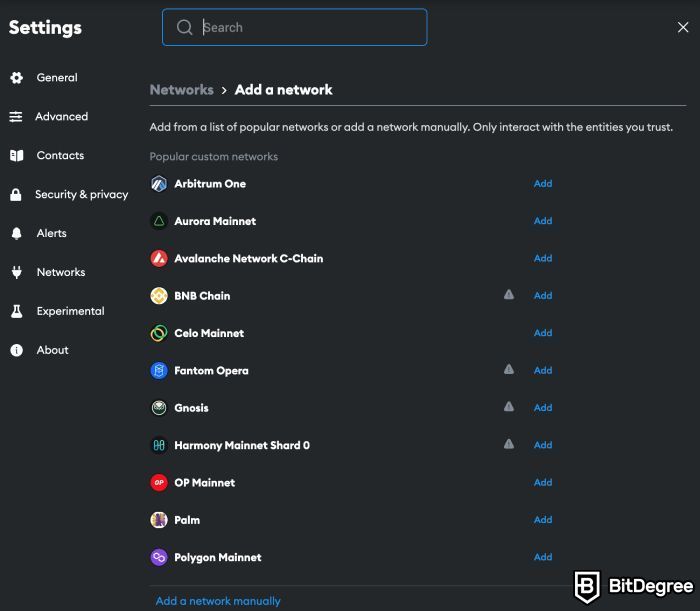
You’ll be redirected to a new page. Here, you won’t be able to search for the BNB testnet and add it - instead, scroll down to the bottom of the page, and click “Add a network manually”.
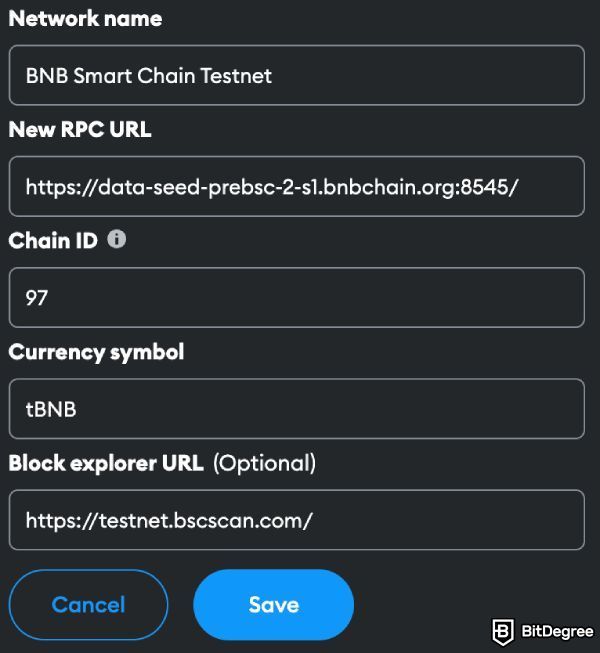
On the new window, you will need to enter the following information:
| Network Name: | BNB Smart Chain Testnet |
| New RPC URL: |
https://data-seed-prebsc-2-s1.bnbchain.org:8545/ |
| ChainID: | 97 |
| Currency Symbol: | tBNB |
| Block explorer URL: | https://testnet.bscscan.com/ |
Once you’re done, it should look like this:
That’s it - you’re ready to receive BNB testnet tokens!
Setting Up Coinbase Wallet
MetaMask’s not really up your alley? Fair enough - here’s how to set up a Coinbase Wallet:
Step 1: Navigate to the the official Coinbase Wallet webpage, and click on “Download”, at the top-right corner of the screen.
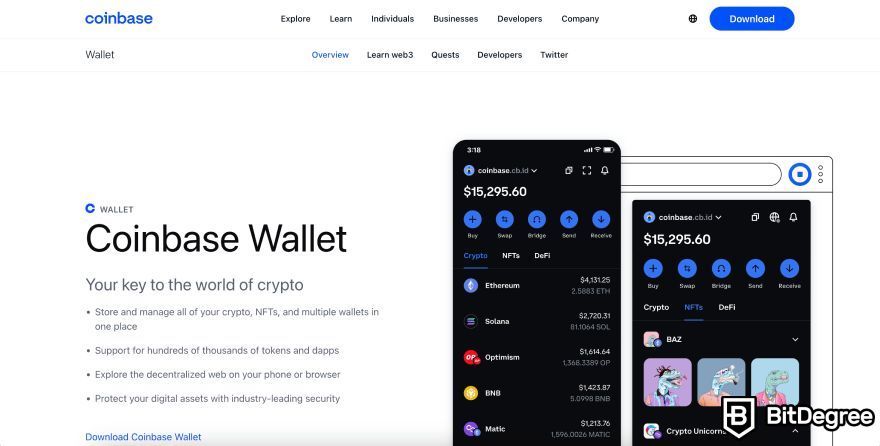
Step 2: Coinbase Wallet supports iOS, Android, and Chrome, and is available as a mobile app or a browser extension. Pick the one that you’re using.
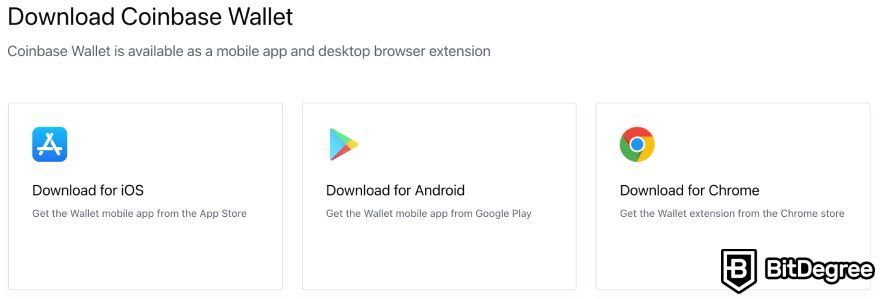
If you’re using Chrome, this step is the same as with MetaMask - you get redirected to the Chrome Web Store, where you can add Coinbase Wallet as a browser extension.
Step 3: Once added, the wallet will be available in your extension list. Accessing it via the list will prompt the creation process.
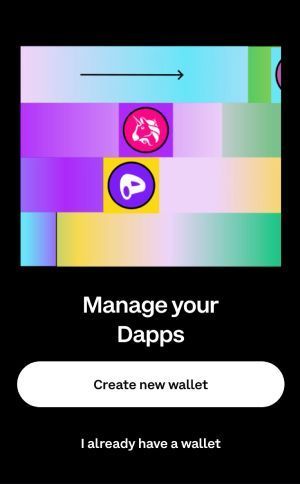
Step 4: Creating a Coinbase Wallet is very similar to MetaMask. First, you’ll need to save your wallet recovery phrase, so that if you lose access to your wallet, you could still get it back.
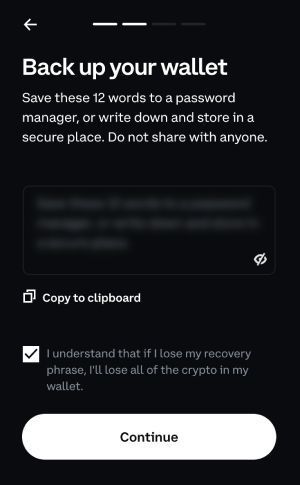
Step 5: Next up - create a password.
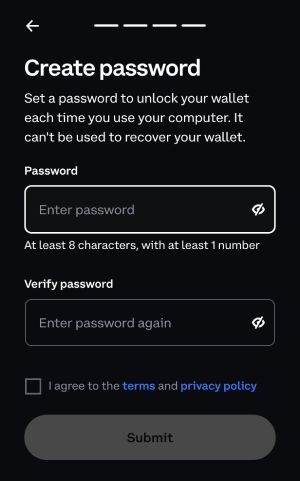
Whenever you find yourself using a service that requires switching to a BNB testnet, you’ll be prompted to do so - switching to the BNB testnet manually on the Coinbase Wallet isn't really an option. The switch to the network will happen automatically, when you’ll connect to a platform with the wallet.
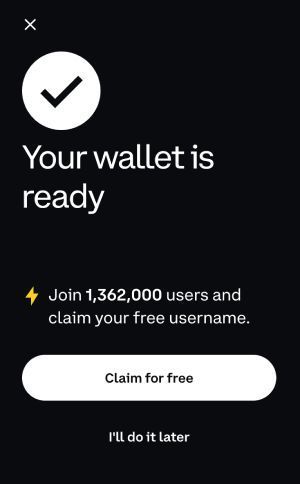
Do note, however, that if you want to use the Coinbase Wallet for testnet purposes, you’ll need to have some actual ETH within it. That’s not the case with MetaMask.
Getting Yourself Testnet Tokens: The BNB Faucet
You have your wallet(s) ready - let’s get to the point of this guide, and acquire some testnet BNB coins.
The easiest, fastest, and least hassle-involving method of getting some testnet tokens would be using a faucet.
Faucets have been around since the early days of crypto - they’re used on both mainnets, as well as testnets. I’ll be using the Testnet BNB Chain Faucet, but a lot of other, third-party faucets will work almost the same.
Step 1: Navigate to the faucet of your choosing.
Step 2: Most faucets will ask you to solve some sort of a captcha. It’s annoying, but this is how they protect themselves against bots. So, be patient, and power through.
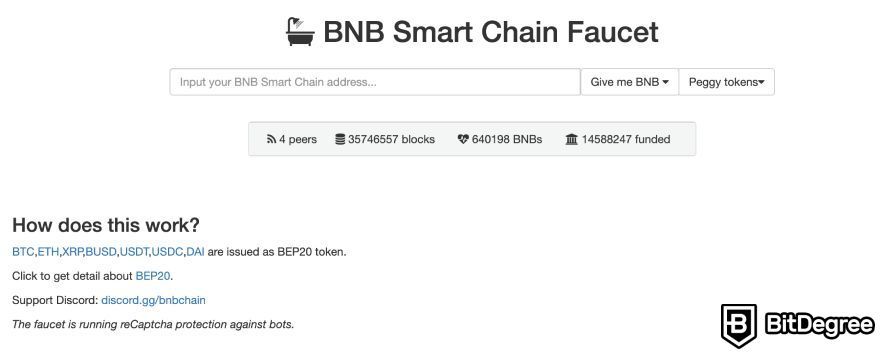
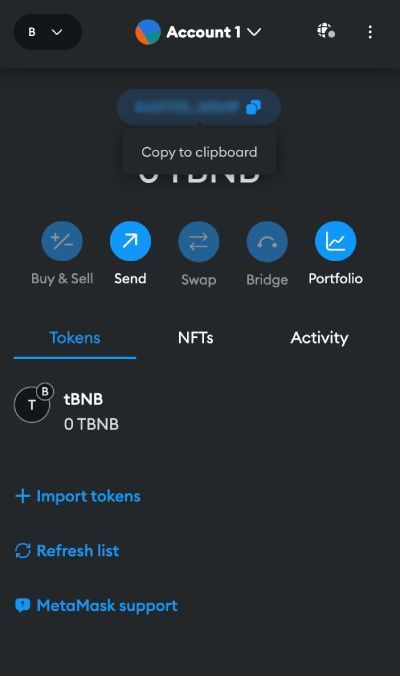
Step 3: Once you’re on the test BNB faucet page, you’re essentially half-done. Open up your wallet (I’ll use MetaMask as the example), and copy your wallet address (click on small string of numbers and characters at the top of the wallet popup).
Step 4: Back on the BNB testnet faucet, paste the copied address into the empty field, and click “Give me BNB” → “0.3 BNBs”.
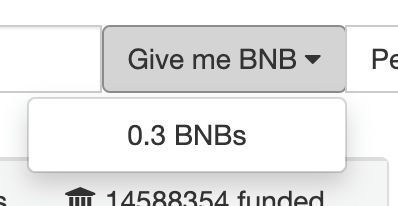
After a few seconds, check your wallet - your tBNB (testnet BNB coins) should have already arrived!
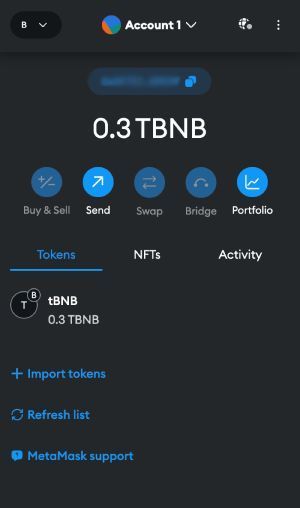
That’s it - you now know how to get tBNB from a testnet BNB faucet!
Conclusions
To wrap things up, I will say - depending on the wallet that you’re using, or the BNB testnet faucet that you choose, the process described in this tutorial might differ a little bit.
That being said, the general flow will remain the exact same - you create a wallet, visit a BNB testnet faucet, and fund your wallet with testnet BNB.
Sometimes, you might see the “BSC testnet” or “BSC faucet” mentioned. Note that while Binance has been doing a lot of changes with their networks, and it has gotten a bit confusing, BSC is now a part of the BNB chain.
On top of that, don’t forget that some wallets - such as the Coinbase Wallet - might require you to hold some ETH to either use a faucet, or to interact with a testnet, in the first place. You can acquire ETH on one of the top-rated exchanges, such as Binance or Kraken.
The content published on this website is not aimed to give any kind of financial, investment, trading, or any other form of advice. BitDegree.org does not endorse or suggest you to buy, sell or hold any kind of cryptocurrency. Before making financial investment decisions, do consult your financial advisor.
