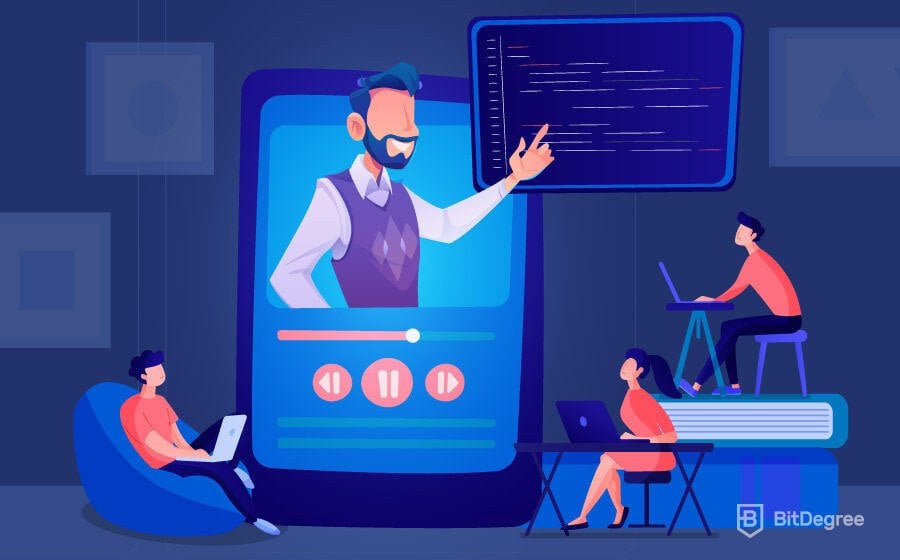
Bringing the Classroom Experience Online
If you spent your whole life between the board and the students, switching to a different environment may seem like a challenge – but with BitDegree, it doesn’t have to be! All you need to start is your lecture materials, a camera or a smartphone, and a place to film. You don’t need to create any slides (though you can use them if you already have some ready): you can simply stand in front of a whiteboard like you would in a classroom, and deliver the lecture as you normally would. If you are already using tools to livestream your lectures, we would still recommend recording them: this would allow the students who didn’t get the chance to see the livestream to catch up later. In addition to that, you would be able to track your students’ progress like you would in a physical classroom. If this is your first time filming a class for remote learning, use the list below as a checklist to make sure you haven’t forgotten anything important:
- Materials. Prepare your materials: if you have a whiteboard, set it up. Check if your markers have ink. If you have slides, you might want to only record the audio or film yourself as you guide people through them (you will find more instructions on how to do that below). If you have some teaching material in text, save it as a .doc or .pdf file: you can later add it as a downloadable resource or save it as a separate lecture.
- Place. Find a quiet place where you could film undisturbed. If you don’t know where to stand, the best thing you can do is find a light wall: not only will it reflect the light well, but it will also help your students concentrate better without any distractions.
- Lighting. Make sure that the space is well-lit, and you will be clearly visible in the video. Natural lighting is always best, but you can also use lamps – just don’t rely completely on a ceiling lamp. Try taking your desk lamp and directing it at you to properly light up your face. Make sure you don’t create too many shadows: this can be distracting.
- Sound. Try to say a few sentences aloud in the room: are they echoing back? If so, try to soften the sound by adding some soft surfaces around you (e.g., if you cover a bare wall with a blanket, the sound won't be able to bounce back). A place where everyone will easily understand what you are saying is always the best option. Speak loud and clear, and make sure your microphone can easily pick up your voice. We'd advise you to have a few tries before you start recording your lesson: this will allow you to check whether the microphone is recording your voice properly.
- Outline / script. Plan and prepare what you are going to say in the lecture. Practice your text, questions, and pauses a few times, so when it comes to filming, everything goes smoothly.
- Filming. If you have a smartphone or a camera, check their recording settings first: set them to the highest possible quality (720p would be recommended) and 16:9 type of video. If it's possible to choose the format in which the videos will be saved, choose MP4. Set up your phone / camera on a solid surface and make sure you are both seen and heard well. Do a few minute tests: film yourself starting the lecture (it might feel weird at first, talking to your phone instead of students – don’t worry, you'll get used to it soon!) and review the video: does everything look good, or maybe you need to make a few adjustments? When you’re filming, try to look directly at the camera: this way, your students will feel as if you are talking directly to them. Don't make too many pauses (unless you can edit them out later) and stick to your plan as you deliver your lecture.
- Recording slides with a voiceover or the so-called ‘talking head’. Choose this if you are a little more advanced with editing, as you will have to combine multiple different sources into one video. If you have slides prepared, you can do slides with a voiceover or a video of you talking in the corner of the screen. To be able to do this, you will need a computer microphone and three applications: a screen recorder, a video recorder (smartphone / camera), and an audio recorder (already present in most computers – or you can use your phone / camera). Then, you would just have to narrate the slides.
- Exporting / Editing. Once you have your video, upload it to your computer or Google Drive so you can access it later. If you made a few mistakes during filming and know how to use editing programs, you can do some additional touches to your video, but it's not necessary.
If you have more questions on how to make video lectures, you can write to [email protected], and we will help you. Once you have your video material ready, you can head to BitDegree and start uploading!
Creating the Course
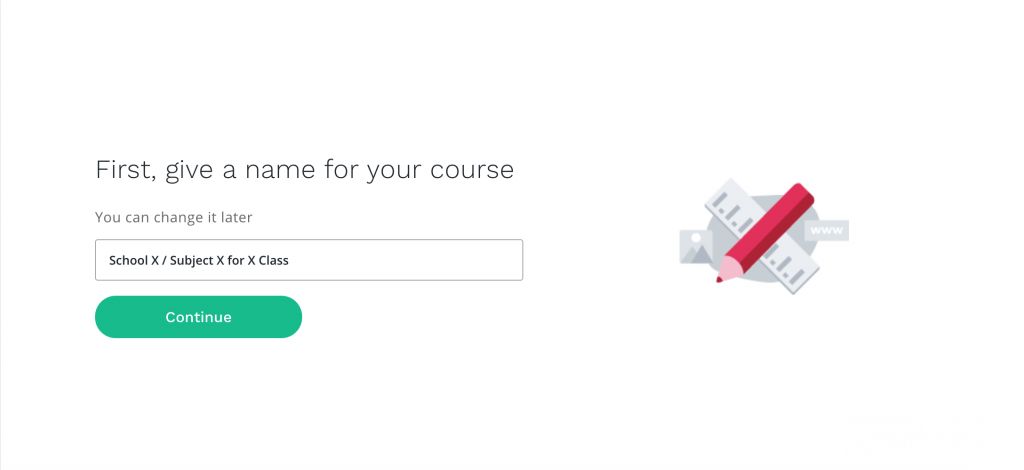
To create a course, you would first need to access the Instructor area. You can do that through your profile or by simply typing the link: https://www.bitdegree.org/courses/studio. Of course, the educator needs to sign up to the platform beforehand. Once there, they can choose to create a new course, starting with the title. We suggest including the school, subject, and class name – this way, your course will not be confused with others, presented by other educators who teach the same subjects.
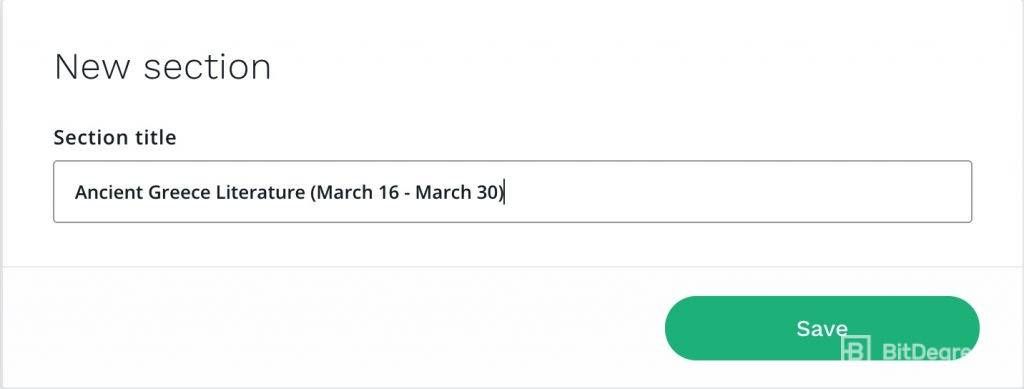
 BitDegree recommends dividing your educational material into sections according to topics, as this would provide structure and guidance for the students. We'd advise you to create sections based on the ongoing topic and name it according to the dates in the student curriculum (e.g., if they were supposed to be studying Greek literature on the 16–30th of March in the university, a lecturer could impose similar guideline dates online). This would help students understand when they should be finished with this section.
And now, we move over to the fun part: uploading lectures! The most common type of lectures is video lectures, which should last for 3–10 minutes. Why this long, specifically? Well, not only does that ease the upload, but it's also more efficient for online viewing:
- Students find it easier to keep track
- Learners stay engaged more than with longer videos
- Each video focuses on an important point before moving on to the next one
- The teacher can provide relevant material to each video for further studying
While one of the best options for a lecture is to have a video where the teacher explains the subject in detail (if they can use graphics to illustrate the point – even better), you can mix up your lectures by adding text lessons too. By choosing Article, you can provide your lesson in text form, add illustrations that would help get the point across, and embed external videos for further watching. No matter the type of lecture, you can always provide additional materials by attaching them to the appropriate lecture.
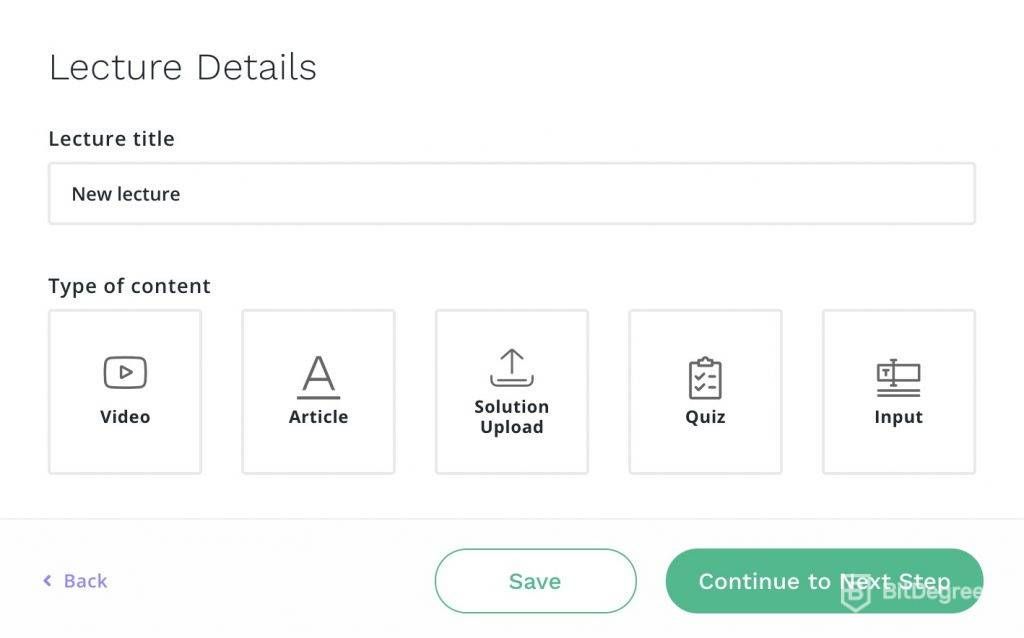
If you want to test your students, you can select the Input type or create a Quiz. If you select the Input type, students can upload a document, and you can select the criteria on which you'll grade their paper. If this is not the option for you, you can also create a quiz. These quizzes can be multiple or single choice, or ask the students to upload their answers in a .doc, .pdf, or different file for the teacher to review. The quizzes also have different features for you to try:
- Question groups. Use this option to create several sets of different questions. One set of questions will then be randomly selected as learners get to the quiz. This option is great if you want to prevent cheating and bring some diversity to your course for different learners without updating course questions too often.
- Required number of questions. You can create multiple questions and choose to only show a part of them. This option allows you to specify the number of questions that will be shown to students when taking the course. The questions will be chosen from the ones you provide at random. This is a good option if you want to prevent cheating and add diversity to your course for different learners.
- Randomize answers. Use this option to mix up the answer sequence for questions. This option can also be used as a prevention for cheating. Keep in mind that if you use this option, you cannot use answers like “All of the above are correct/incorrect”, as there's no way to predict the answer’s position.
- Quiz adds to the total score. Choose this option if you want to compare the learners and track their progress. Such graded assessments do not give your students immediate feedback on correct/wrong answers – instead, they are used to evaluate their understanding of the course like a final exam would. Learners see their score at the end; however, they cannot see those of other students. This is how the lecturer would see the data in the Studio:
Just like with lectures, you can include learning materials / attachments for students to take a look before they take the quiz. Once you have all of the parts you want, it's time to move on to the finishing touches of the course. For this, you will have to provide:
- Visibility: if you select "Public", the course will be visible on the platform's marketplace, so various people will be able to find it and enroll in it. By selecting "Secret", you'll only allow those who have the link to the course to see it: it will not be accessible or visible on the main BitDegree platform. In case you want to control the access even more, you can select "By invitation only": this will allow your course to only be seen by those users whose email address you specify.

- Category: pick "Interactive Learning"

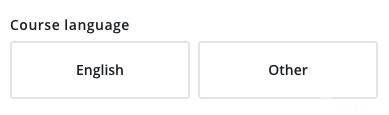
- Language: choose English for the course to appear on the main BitDegree platform
- Skill level: put Beginner if the course is for the first-year students, intermediate for the middle years, and advanced for the final year

- Course thumbnail: it can be drawn by BitDegree team if you don't have a suitable image

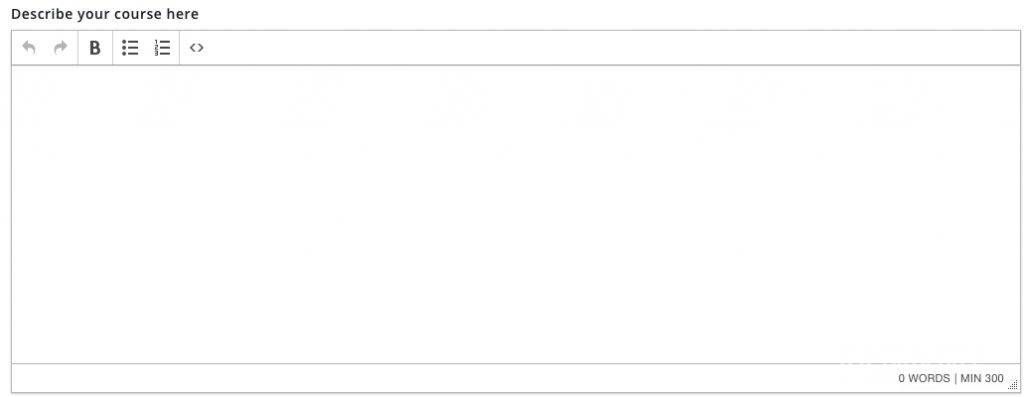
- Course description: the required word count is 300, but a description is only necessary for "Public" courses – if you choose "Secret" or "By invitation only", you won't need to provide a description.
- Course tags: provide your university name, subject, and class year/name. This will help your students find the course via BitDegree search if they lose the link (remember, they can only find through search it if the course is public)

- Requirements: if some supplies (like calculators) or prior knowledge (e.g., reading "Catcher in the Rye") are needed for the course from the students, you can define them down here – otherwise, type in "None".
- Course achievements: key points your students will learn during the course;
- Target students: you can put the class name or study year here.
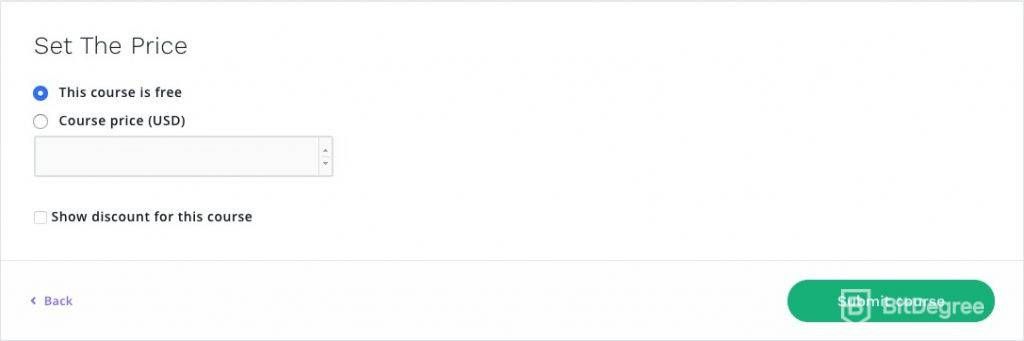
- Lastly, in the Pricing section, select the Free option to allow your students to start learning.
Once you submit the course, somebody from BitDegree Instructors Support Team will check if everything is alright (are the videos working, is the sound quality okay, etc.), and if so, your course will be published. If you wish to upload a paid course (e.g., you create a course that is not aimed at your students specifically and want to allow other people to access it as well), you can also create specific promo codes to gain a bigger audience and allow some students to study for a smaller price.
Making Changes to Your Courses
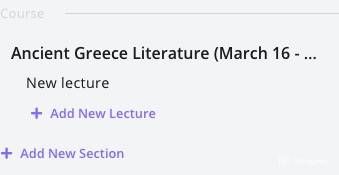
As the course goes further, you might need to add new lectures or sections to it. In this case, simply return to the Instructor Studio, pick the course, choose "Lectures" on the sidebar and press one of the two purple buttons:
Upload new videos, articles, or quizzes for the students, press Save, and your course will be updated – just like that!
Tracking Your Students
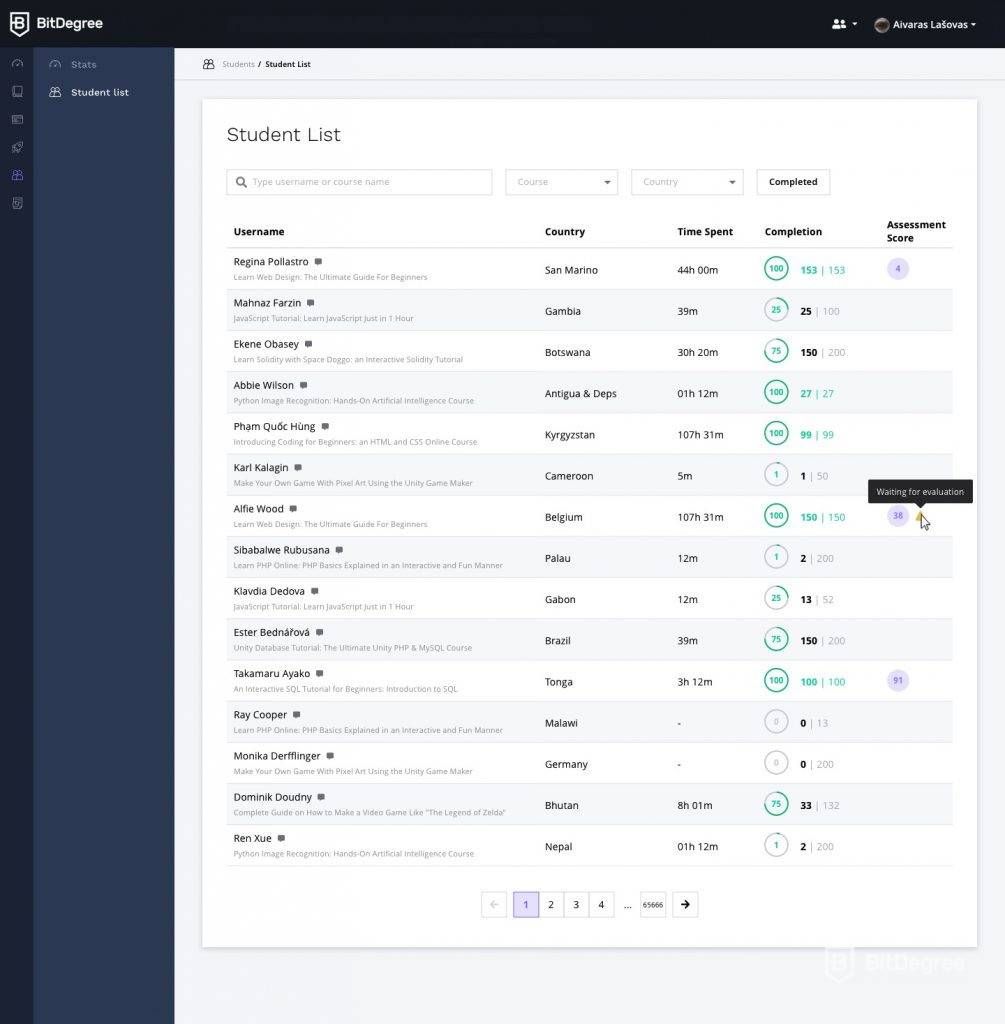
The most important thing for a lecturer is to know how their students are doing: did they understand everything? Did they watch / read all of the required material? What about the quizzes – did they answer every question correctly? Luckily, BitDegree provides simple and straightforward tracking of your students via Student List. Here, along with all of the names of your students, you can also see:
- Time Spent: you can see who takes a bit longer in some lectures, and who devours the materials quickly
- Completion: you can see how many items were completed by the students; if somebody is behind, it might be a signal for you to reach out or clarify some of the materials
- Assessment Score: if your course had quizzes, you can see how well the students performed
Tracking provides an opportunity for you to see not only who is actually paying attention to your classes, but also who is performing better or worse.
You can also track your courses on the Stats page. Here, you will see top geographies (where your students are from) and the total number of students, find out how many of them are enrolled, learning, or finished the courses at any given time, as well as see the averages (quiz scores, progress, and time spent in courses).
Keep Your Students Engaged With BitDegree!
It's not difficult to create a course on BitDegree, and it brings so many more advantages than a simple learning platform. Not only do the lecturers get the possibility to track their students' progress just like they would in real life, but the students are also being motivated to strive for their best via the gamified system. Sure, they still need to prepare and go through all of the lectures, but they're also always able to discuss the lectures with educators and classmates, compete for the best score, and track their progress.
With BitDegree, university and formal education could become more than a chore. It could be an engaging learning quest that students look forward to as they gain not only knowledge but also levels, experience points, puzzle pieces, and more. So, what would you need to become a part of BitDegree and offer this learning journey for your students? Your teaching materials (that are probably already prepared in advance) and good internet connection. We're looking forward to meeting you in the Instructor Studio.